Suppose you need to create and edit a video quickly. You might need to combine multiple videos and photos, crop a video, add background music, and so on. For such simple tasks, you’ll need to use online video editors. Why should you have to download program editors to your computer? They are often expensive and take up space on your hard disk. Online editors allow you to do the same thing in a browser without having to download and install programs.
Today I’m going to show you how to create online videos by combining multiple images and music with an extremely simple online tool called FlexClip.
What is FlexClip?

FlexClip is an easy-to-use online video editor that lets you easily turn your ideas into animated videos. Even if you don’t have the professional editing skills, you can use simple drag-and-drop features to create a video that will amaze your audience.
How to Create Online Videos from Photos in FlexClip
Step 1: Prepare a computer with a network connection and the available materials you want to include in your video.
Step 2: Go to https://www.flexclip.com/ to create an online video clip. Click Get Started – Free, and then the website will prompt you to sign in to complete the next steps. You can always click Sign in with Facebook or Sign in with Google to quickly sign in.
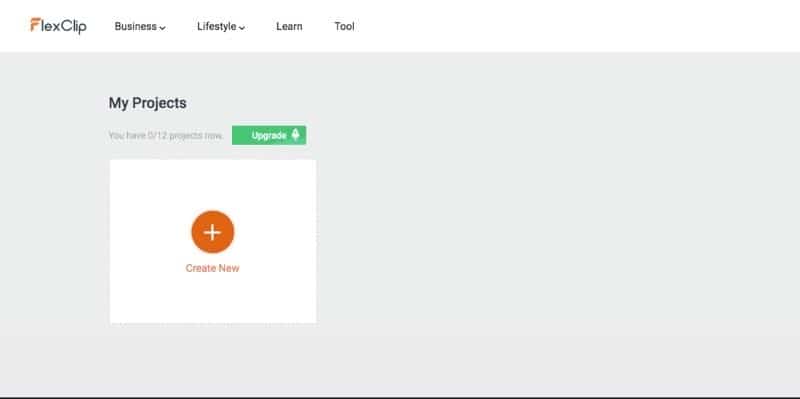
Step 3: Click the Create New button below the My Panel page to start creating videos.
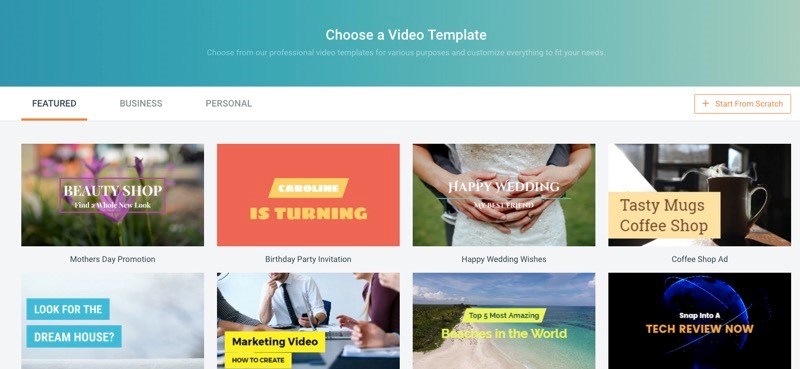
Step 4: Select Start from Scratch in the upper right corner of the pop-up template page.
Step 5: Then you will be directed to the main editing interface to start adding images, videos, logos, text, and music, etc.
Step 6: Click Add Local Media and upload your favorite pictures or videos to the storyboard. Here you can change the order of the pictures or videos, add transitions, or delete material you don’t want to use with one click.
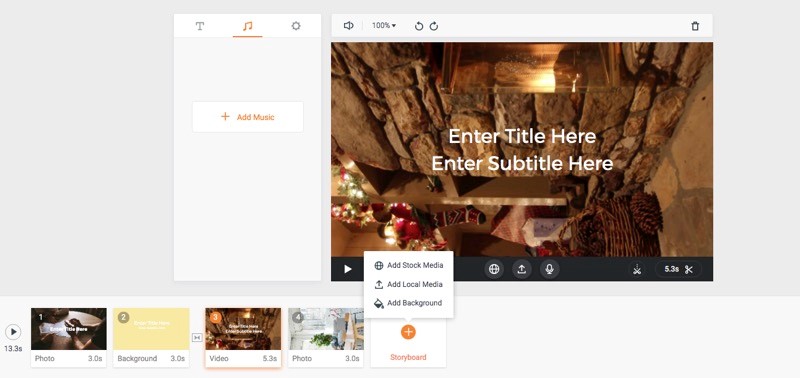
Tip: Click on any uploaded material to edit it, for example, to add captions, rotate it, or zoom in and out.
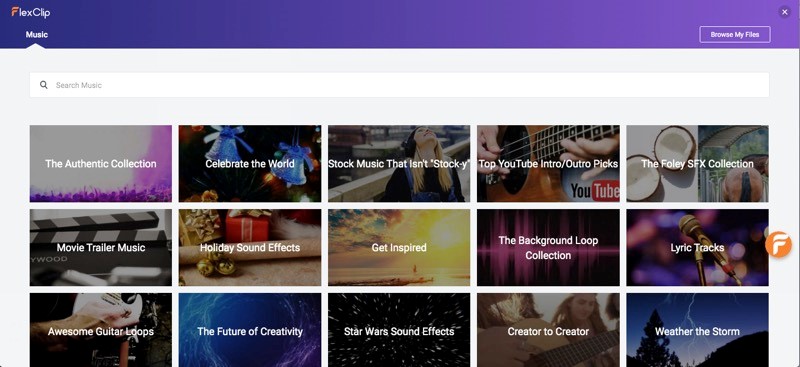
Step 7: Click the Add Music button to upload a song from your device or select a song from the FlexClip audio library. You can then cut the music or adjust the volume to your liking.
After you upload your photos, videos, and music, click the Preview button at the top of the screen to preview your video. If you like it, just click the Export Video button or click Continue Editing if you’re not satisfied with the video.
Step 8: After you click Export Video, you will need to select the video quality (480p, 720p or 1080p)
You will have to wait a while for the software to create the video for you. Depending on how many materials you upload and the output quality you choose, the time will vary. The higher the quality, the longer it takes to create the video.
So now I’ve explained how you can create online video clips with photos, music, and custom text to suit your needs. If there are any difficulties, please leave a comment at the end of the article for assistance. Good luck!
